The set of tiles that I was tasked with reproducing are glazed in what was called "mottled" or "sponged" glazing. It was a very popular type of glazing for both the field tile and the decorative banding, although I think it tends to obscure the details in the decorative tiles too much.
 |
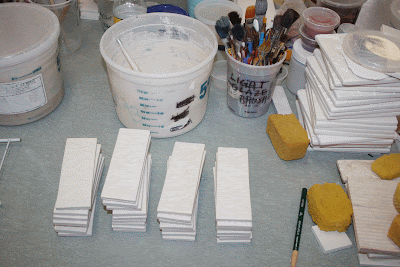
| The decorative tiles on my glaze table. The first step is to figure out what the base glaze is, and how thickly it should be applied to allow the other colors flow into it. These tiles have a slightly yellow base on them. |
 |
| I brush the base glaze onto the tile. |
 |
| A thick even coat dries quickly and is ready for the next step. |
 |
| I use a small natural sponge to apply the contrasting color, hence the name for this style of glazing - "sponged tiles"! |
 |
| The sponge actually creates the pattern that will remain visible even after the glaze firing has melted the two glazes into each other. |
 |
| Here are the coordinating field tile that will fill in the remaining area of the fireplace hearth. They get the same glaze treatment of hand painted base glaze with sponged glaze details on top. |
 |
| The top tile is the original piece, uncleaned with dirt and debris. The center tile is my reproduction. The bottom partial tile is an original tile that I cleaned and re-fired to a very low temperature to remove the cement and varnish. It lightened up the glaze slightly, and the client decided to have me match that glaze rather than the more yellow one with darker maroon details. |
I was very happy with the finished tile and it got a thumbs up from the customer, so all's well so far! They have just ordered more field tile to add to the interior firebox, which I'm hoping will ship this week. As soon as I get photos of the finished fireplace I'll post them.
I hope you've enjoyed my series on reproducing a Victorian tile, and please let me know if you have any questions about the techniques that aren't clear enough.
Happy Tiling!!
Labels: L'esperance Tile Works, linda ellett, recreating fireplace tile, replacing a missing fireplace tile, reproducing Victorian fireplace tile, Victorian fireplace tile


6 Comments:
I have thoroughly enjoyed reading your restoration blogs! Excellent work!
Joyflower
Joysilk.blogspot.com
Hi Joy!
Thanks so much! I'm so glad you've followed and enjoyed...I have a few more tile lessons coming up...so check back!
Linda
L'esperance Tile
Thanks for such a clear and well documented description of your process.
Hi Gareth - Thanks for stopping by and I'm glad you enjoyed it!
I still have a pristine slab of red wax sitting by my desk mocking me... I need to find something to carve and dig in!
Hi Brian - I never let my wax get the upper hand...make that first mark and let it know who's the boss!
Good luck!
Linda
Post a Comment
Subscribe to Post Comments [Atom]
<< Home