One of my favorite things to do is to work with enthusiastic customers on creating custom tiles for them. A lovely Etsy customer contacted me and asked if I could create a tile of her Etsy avatar which is a variation of a Hobo sign indicating that 'a good woman lives here'. Her project was to make an address sign for her sister, using other mosaic tiles to surround the cat tile. Carving in wax is a bit pricey, so I suggested a carved line that would be filled in with grout to highlight the image. All agreed and the project is a "Go"!
 |
| I printed out the image on a sheet of paper, grabbed a freshly made 4x4" tile, and jumped into the making process. |
|
|
 |
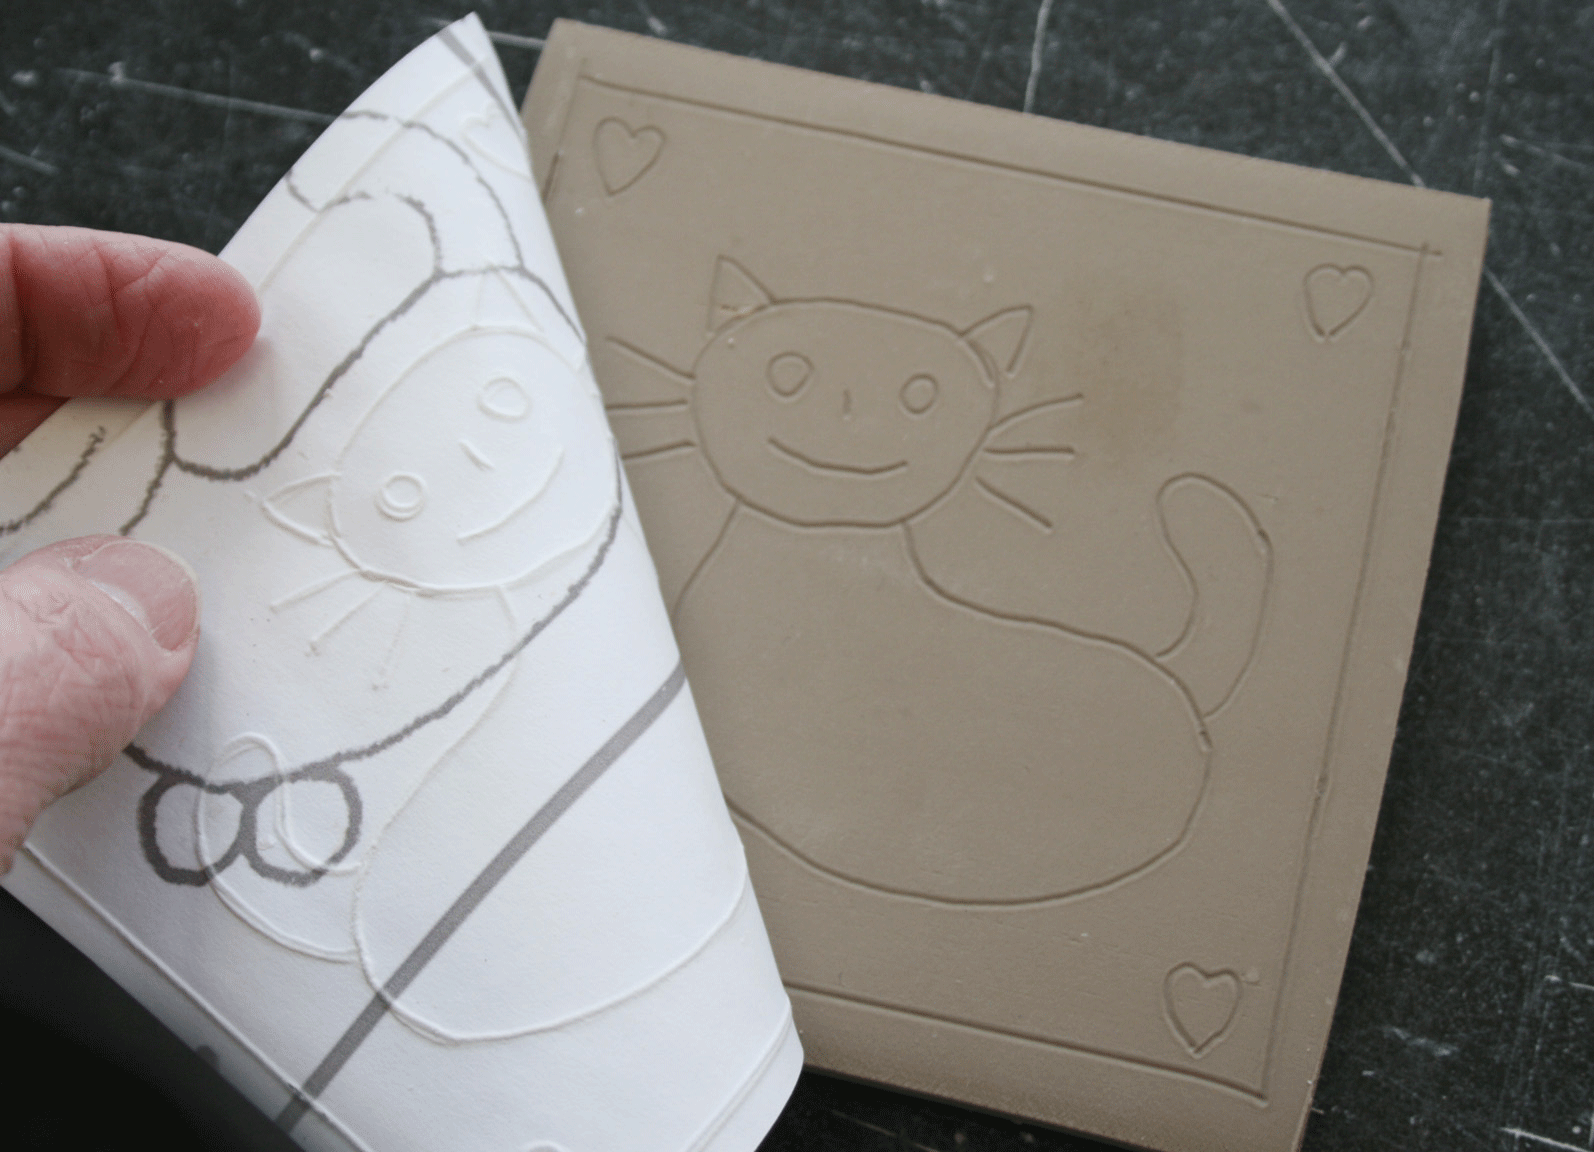
| Laying the paper on top of the clay. |
 |
| Using a pen to trace the design onto the clay surface. |
 |
| Peeling off the paper to reveal the image on the clay. |
 |
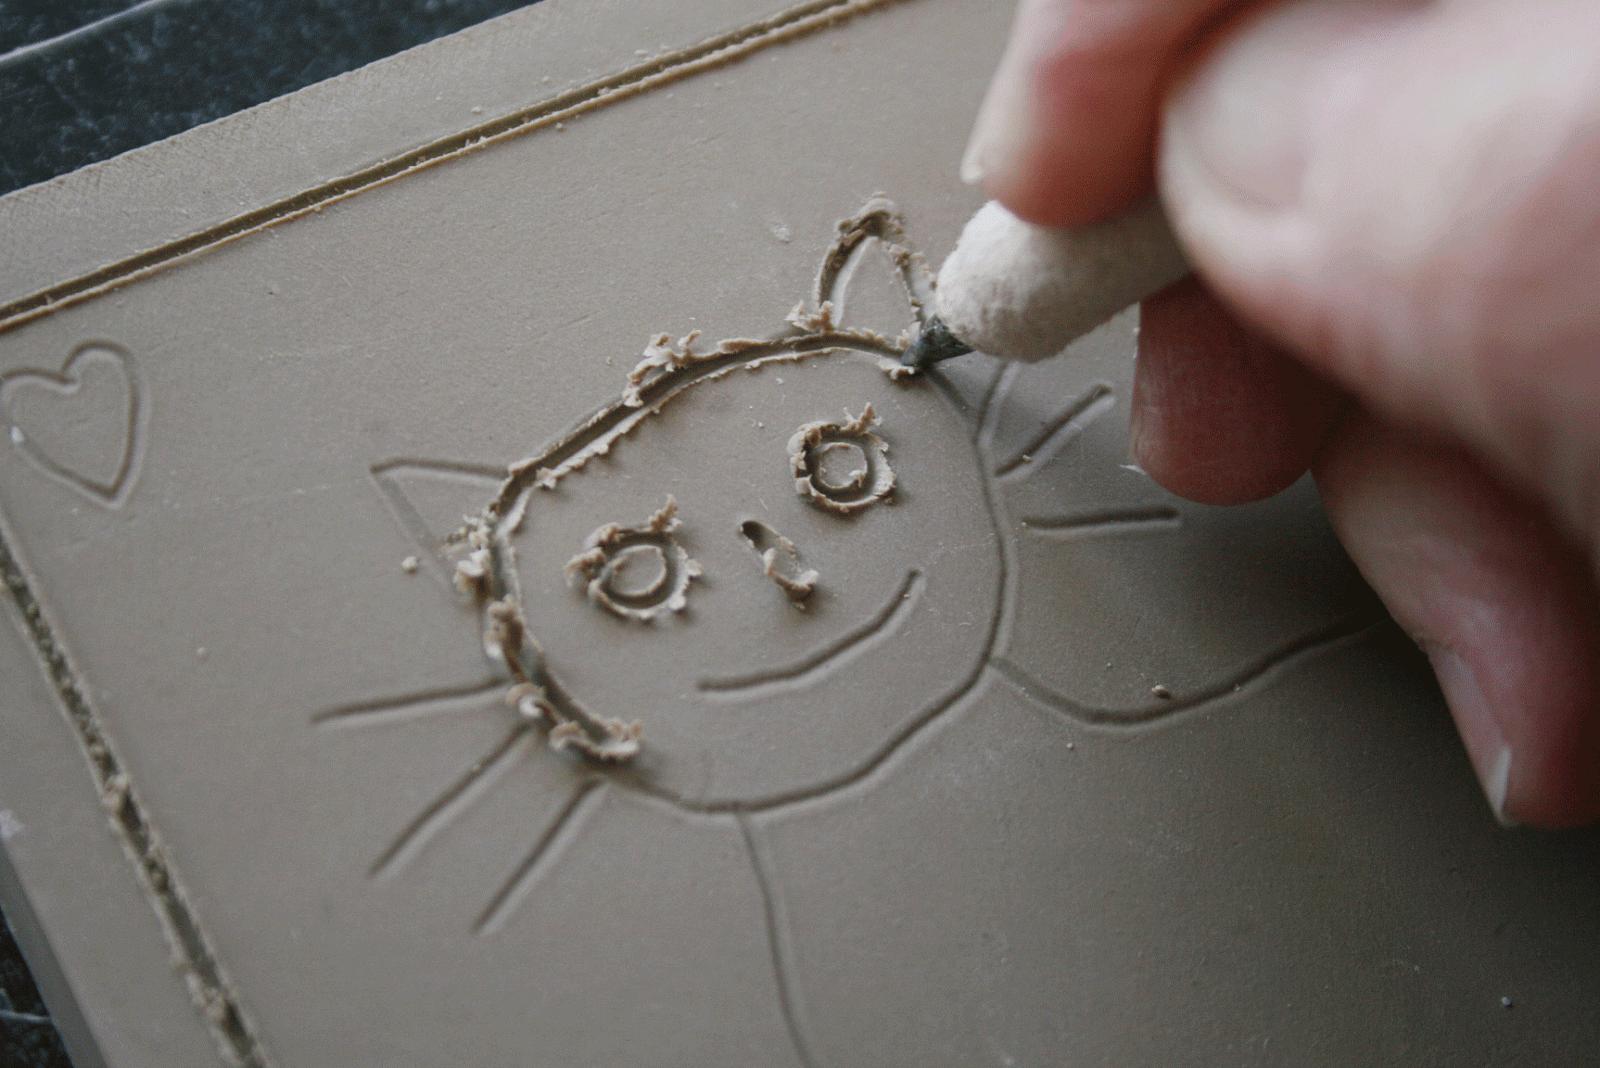
| Using a stylus to create a line deep enough to hold the grout. |
 |
| Finished with creating the line. The clay is leatherhard and crumbles as the line is drawn in it. This needs to be cleaned up. |
 |
| Brushing off all the clay crumbs. |
 |
| After letting the tile dry a bit more I use a carving tool to smooth the lines a bit. Then I use a sponge to give it a nice clean finish. |
 |
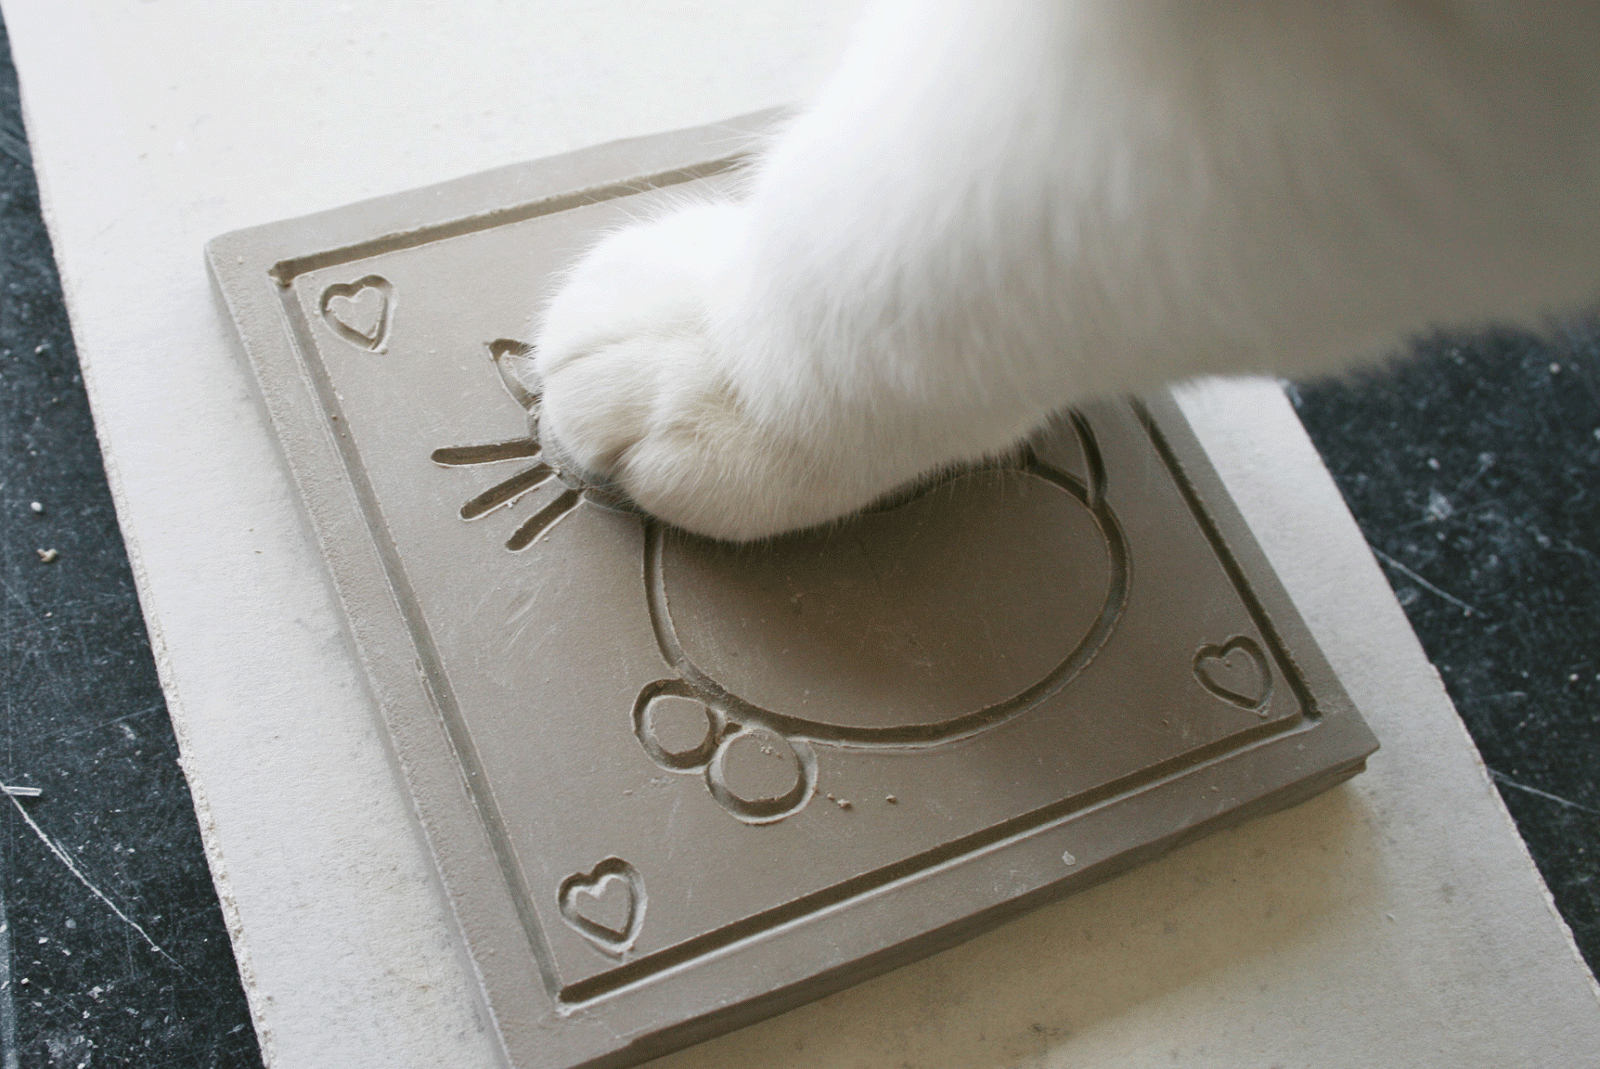
| Of course, I'd never get anything done without Abbey's help. |
 |
| Abbey gives the finished tile her stamp of approval. My kitty digs this cat tile! |
 |
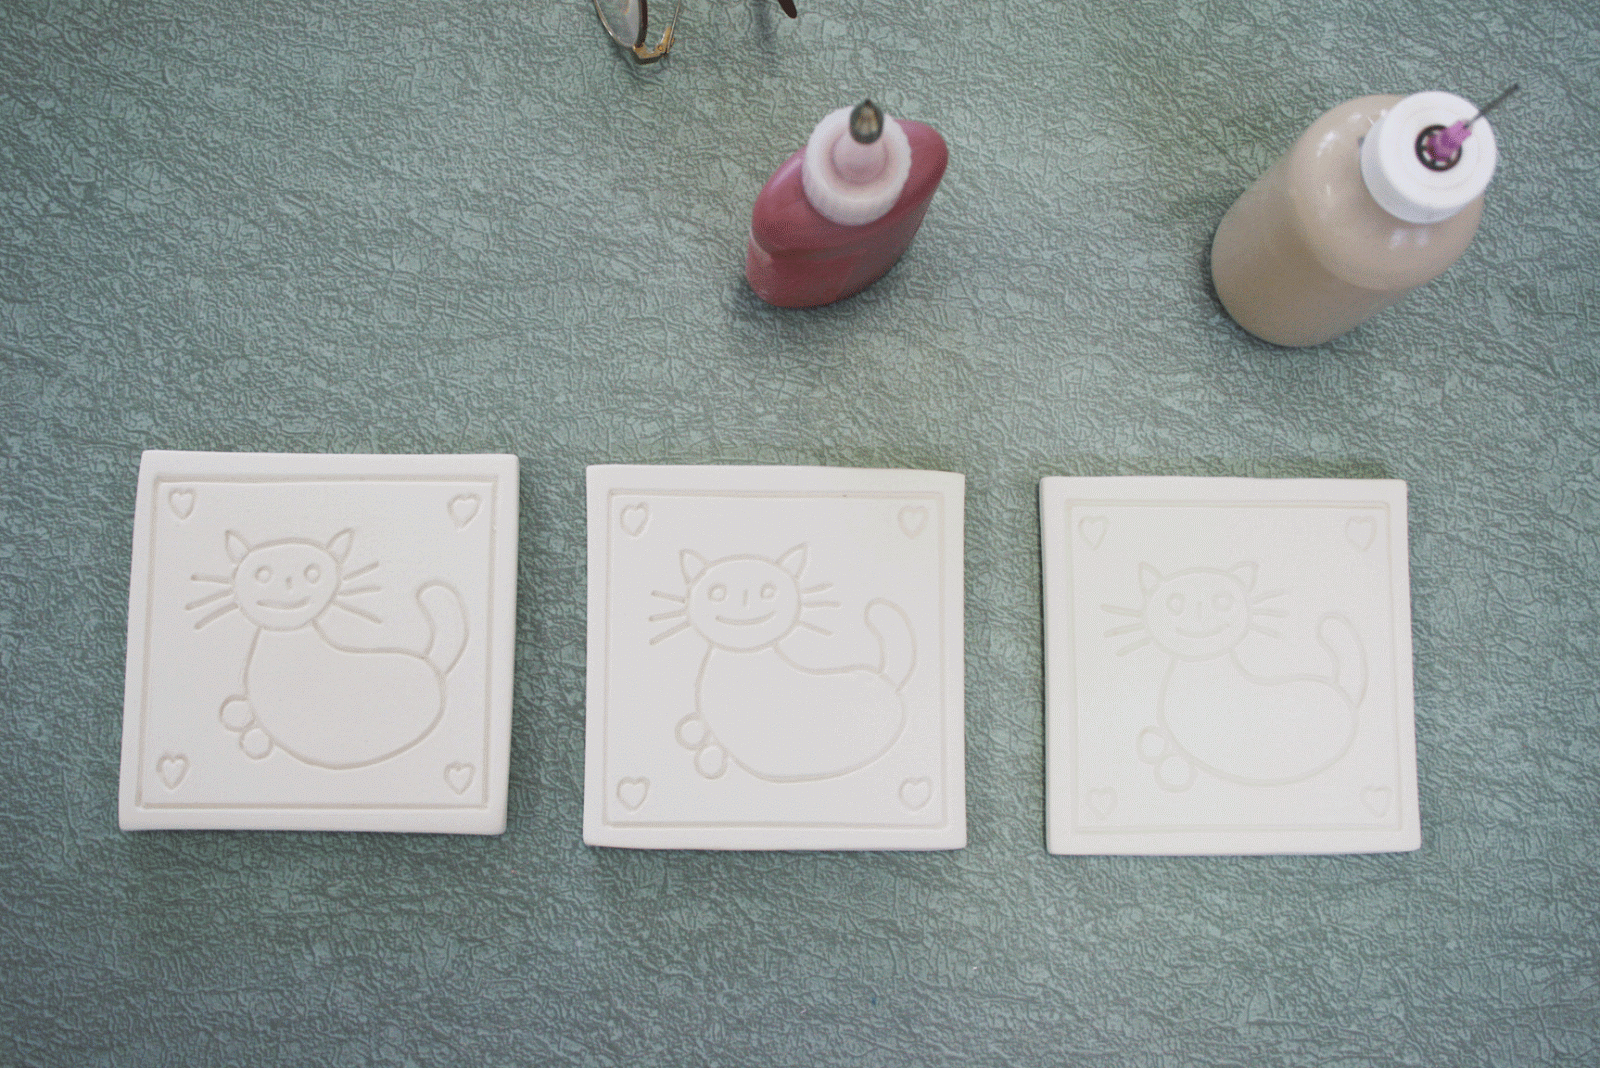
| After the bisque firing the tiles are on the glaze table ready to be glazed. I use slip bottles to glaze the details, as I need to keep the grout lines clear of glaze, so the grout will stick in the lines. |
 |
| I needed 2 tiles, so I made 3, just to have one to practice on, and just in case..... |
 |
| I'm using high fire matte glazes, so they won't run into the lines. Now just to keep a steady hand! |
 |
| This is a maize brown matte glaze. I'm using a cream matte for the other details, and the second tile will have the opposite glazing combination. |
 |
| Glazing the cream details. |
 |
| One of the glazed tiles before firing. |
 |
| Here are the 3 glazed tiles in one of the tile cranks, on their way to the kilns for firing. |
 |
| The finished tiles. I used a neutral brown grout to fill in the lines of the tile on the right, just so that I could see what it will look like after grouting. The customer will use a dark green grout, and I'm looking forward to seeing her finished project! |
Have an idea for a custom tile? Send me a convo through my
Etsy shop or email me at lestile@nycap.rr.com.
Labels: custom tile, custom tile for your kitchen, etsy, glazed tile, handmade ceramic tile, L'esperance Tile, linda ellett


9 Comments:
aww!i love the designs these are all so beautiful and cute,i would love to have some of those in my little baby room.
thank you so much for such a lovely blog!
Arlington tile
I learn something new ever time you post! Meow,that kitty is adorable.
Thanks for visiting img ti!
Hi Meredith - always a pleasure to have you stop by!!
Linda
wow, I had no idea how time consuming a tile is, what a great demonstration and love your cat, he didn't dent the tile did he? My cats have to get into the middle of everything too.
This is really similar to the Mishima that I'm doing. I love how you've documented all of the steps so buyers can appreciate the time and effort you put into each piece. Linda Starr recommended that I check out this post, I'm glad I did. I'll be returning soon.
Hi Linda and Lori!!
So nice to have you both stop by and visit!!
Yes, we do make it look easy, but every crafts person and artist knows how much work actually goes into the smallest detail....
Cheers!
Linda
Linda - this was a great post - I pulled Rick over to watch. I loved how Abby gave her seal of approval. Thanks for sharing!! Jaye
Hi Jaye - So happy you stopped by!! Looking forward to sharing my studio space with you in July!!!!
xxLindaoo
Post a Comment
Subscribe to Post Comments [Atom]
<< Home